5 Essential TradingView Indicators Every Beginner Trader Should Master
Master the five most powerful TradingView indicators that every beginner trader needs for success: Moving Averages, RSI, Bollinger Bands, MACD, and Volume Profile. Learn how to set up, interpret, and combine these indicators into a complete trading system with our comprehensive, step-by-step guide. Discover professional trading strategies used by successful traders to identify high-probability setups and automate your trading with TradingView's PineScript.
5 Essential TradingView Indicators Every Beginner Trader Should Master in 2025
When you're just starting your trading journey, the sheer number of indicators available on TradingView can be overwhelming. With hundreds of technical analysis tools at your fingertips, how do you know which ones actually matter for your trading success? The truth is, while experienced traders may use complex combinations of indicators, beginners can build a solid foundation with just a handful of powerful tools that provide actionable insights.
In this comprehensive guide, we'll explore the five essential TradingView indicators that every beginner should master before moving on to more advanced strategies. These indicators provide critical insights into trend direction, momentum, volatility, and potential reversals—all vital components of successful trading across any market, whether you're trading stocks, forex, or cryptocurrencies.
By the end of this article, you'll understand how to properly set up, interpret, and combine these powerful indicators to identify high-probability trading opportunities while avoiding common beginner mistakes. You'll also learn how these same indicators can be automated using TradingView's PineScript to create your own custom trading strategies or implement our professional-grade systems.
1. Moving Averages (MA): Your Essential Trend Compass
Moving Averages are perhaps the most fundamental indicators in technical analysis, smoothing out price data to identify the direction of the trend while filtering out market noise that can lead to poor trading decisions.
Why Moving Averages Matter for Your Trading Success
Moving averages help you determine whether a market is in an uptrend, downtrend, or moving sideways. They act as dynamic support and resistance levels and can signal potential entry and exit points when different moving averages cross. Unlike many complex indicators, moving averages are based directly on price action, making them among the most reliable technical tools available.
Types of Moving Averages on TradingView
TradingView offers several types of moving averages, each with unique characteristics:
- Simple Moving Average (SMA): Calculates the average price over a specific number of periods, giving equal weight to each price point. Great for identifying general trend direction.
- Exponential Moving Average (EMA): Gives more weight to recent prices, making it more responsive to new information and price changes. Ideal for traders looking for faster signals.
- Weighted Moving Average (WMA): Assigns a higher weighting to more recent data points. Sits between SMA and EMA in terms of responsiveness.
- Hull Moving Average (HMA): Developed to reduce lag while maintaining smoothness. Particularly useful for identifying trend changes earlier.
How to Set Up Moving Averages in TradingView
To add moving averages to your TradingView chart:
- Click on the "Indicators" button at the top of your chart
- Search for "Moving Average" in the Indicators & Strategies window
- Select your preferred type (SMA, EMA, etc.)
- Adjust the period and color settings as needed
- Click "Add to Chart"
The Most Effective Moving Average Settings for Beginners
For beginners, we recommend starting with these specific settings:
- 20-period EMA (blue): For identifying short-term trends and immediate price direction
- 50-period SMA (yellow): For identifying medium-term trends and potential support/resistance
- 200-period SMA (red): For identifying long-term trends and major market structure
Moving Average Trading Strategies That Actually Work
Here are three proven moving average strategies that consistently perform well:
1. Golden Cross & Death Cross Strategy
When the 50-period SMA crosses above the 200-period SMA (known as a "Golden Cross"), it's often considered a strong bullish signal indicating a potential long-term uptrend. Conversely, when the 50-period SMA crosses below the 200-period SMA (a "Death Cross"), it's typically viewed as a bearish signal suggesting a possible long-term downtrend.
Real-World Example: In March 2020, when the S&P 500 experienced a Death Cross, it signaled the beginning of a significant downturn. Traders who recognized this signal could have protected their portfolios by reducing exposure or positioning for downside movement.
2. Moving Average Bounce Strategy
During strong trends, price often pulls back to a key moving average before continuing in the trend direction. The 20-period EMA often acts as support during uptrends and resistance during downtrends. When price approaches this moving average during a confirmed trend, it can present a high-probability entry opportunity.
Trade Setup:
- Confirm the overall trend using the 50 and 200-period SMAs
- Wait for price to pull back to the 20-period EMA
- Look for a rejection candle (such as a hammer in an uptrend or shooting star in a downtrend)
- Enter in the direction of the main trend with a stop loss below the rejection candle
3. Triple Moving Average Strategy
Using our recommended 20 EMA, 50 SMA, and 200 SMA setup, look for alignment of all three averages:
- Bullish Alignment: 20 EMA above 50 SMA, which is above 200 SMA
- Bearish Alignment: 20 EMA below 50 SMA, which is below 200 SMA
When all three moving averages align, the trend is considered strong. Trading in the direction of this alignment can significantly improve your win rate.
Common Moving Average Mistakes to Avoid
Be aware of these potential pitfalls when using moving averages:
- Overreliance on a single timeframe: Always confirm signals across multiple timeframes
- Ignoring market context: Moving averages work differently in trending vs. ranging markets
- Using too many moving averages: This can create confusion and analysis paralysis
- Following signals blindly: Remember that moving averages are lagging indicators and should be used in conjunction with other analysis tools
2. Relative Strength Index (RSI): Measuring Market Momentum with Precision
The Relative Strength Index (RSI) is a powerful momentum oscillator that measures the speed and change of price movements, helping you identify overbought and oversold conditions that often precede significant price reversals.
Why RSI is Critical for Timing Your Entries and Exits
The RSI helps traders spot potential reversals by indicating when an asset may have been overbought (suggesting a potential sell-off) or oversold (suggesting a potential bounce). It's particularly useful for identifying potential entry and exit points and can help you avoid buying at market tops or selling at market bottoms—common mistakes that plague beginners.
How to Set Up RSI in TradingView
To add RSI to your chart:
- Click on the "Indicators" button at the top of your chart
- Search for "Relative Strength Index" in the Indicators & Strategies window
- Click "Add to Chart"
- The default period is 14, which works well for most timeframes
Understanding RSI Values and What They Tell You About Market Conditions
The RSI oscillates between 0 and 100, with traditional settings interpreting:
- RSI above 70: Overbought condition - potential selling opportunity
- RSI below 30: Oversold condition - potential buying opportunity
- RSI at 50: Neutral momentum, often used to confirm trend direction
Advanced RSI Trading Techniques for Beginners
1. RSI Divergence Strategy
Bullish Divergence: Occurs when price makes lower lows, but RSI makes higher lows. This suggests that downward momentum is weakening, potentially signaling an upcoming reversal to the upside.
Bearish Divergence: Occurs when price makes higher highs, but RSI makes lower highs. This suggests that upward momentum is weakening, potentially signaling an upcoming reversal to the downside.
How to Trade RSI Divergence:
- Identify a clear trend
- Look for price making new highs/lows
- Check if RSI is making opposite movements (not making new highs/lows)
- Wait for confirmation with a reversal candlestick pattern
- Enter the trade in the direction of the potential reversal
2. RSI Range Trading Strategy
During range-bound markets, RSI becomes particularly effective:
- Identify a trading range where price is oscillating between support and resistance
- Buy when RSI drops below 30 and then crosses back above it (especially near support levels)
- Sell when RSI rises above 70 and then crosses back below it (especially near resistance levels)
- Set stop losses beyond the established range boundaries
3. RSI Trendline Breaks
Just like price, RSI can form trendlines that, when broken, often signal impending price movements:
- Draw trendlines connecting peaks or troughs on the RSI indicator
- Watch for breaks of these trendlines
- A break of a descending RSI trendline often precedes bullish price movement
- A break of an ascending RSI trendline often precedes bearish price movement
Adjusting RSI Settings for Different Trading Styles
While the default 14-period setting works well for most situations, consider these adjustments:
- Shorter timeframes (day trading): 9-11 period RSI for more signals
- Longer timeframes (swing trading): 14-21 period RSI for fewer false signals
- Tight range markets: Consider adjusting overbought/oversold levels to 80/20 instead of 70/30
- Strong trend markets: Focus on the 50 centerline crossovers rather than overbought/oversold levels
Combining RSI with Other Indicators for Higher Probability Trades
RSI works particularly well when combined with:
- Moving Averages: Use MA for trend direction and RSI for entry timing
- Support/Resistance Levels: RSI signals near key price levels have higher probability
- Volume Indicators: Confirm RSI signals with volume expansion for more reliable trades
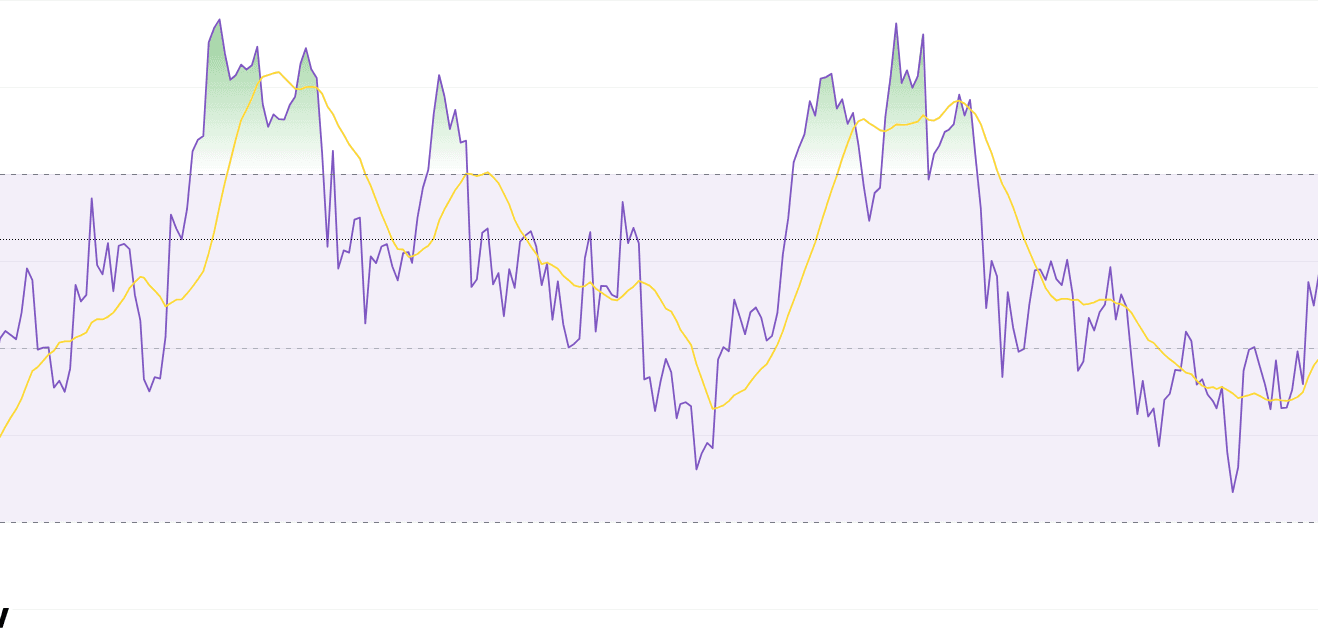
3. Bollinger Bands (BB): Visualizing Volatility for Precise Market Entries
Bollinger Bands consist of a middle band (usually a 20-period Simple Moving Average) with upper and lower bands that expand and contract based on market volatility, creating a dynamic price envelope that helps identify potential reversal points and breakout opportunities.
Why Bollinger Bands Are Essential for Volatility-Based Trading
Bollinger Bands give you a visual representation of volatility and potential support/resistance levels. They help identify when prices might be overextended in either direction and due for a reversion to the mean. Unlike fixed percentage channels, Bollinger Bands adapt to changing market conditions, making them effective across different market environments.
Setting Up Bollinger Bands in TradingView
To add Bollinger Bands to your chart:
- Click on the "Indicators" button at the top of your chart
- Search for "Bollinger Bands" in the Indicators & Strategies window
- Click "Add to Chart"
- The default settings are 20-period SMA with bands at 2 standard deviations
Understanding Bollinger Band Components
- Middle Band (20-period SMA): Represents the average price and often acts as a support/resistance level
- Upper Band (2 standard deviations above): Represents potential resistance and overbought conditions
- Lower Band (2 standard deviations below): Represents potential support and oversold conditions
- Band Width: The distance between the upper and lower bands indicates market volatility
Key Bollinger Band Trading Patterns for Consistent Profits
1. The Bollinger Band Squeeze Strategy
The Bollinger Band Squeeze occurs when volatility decreases and the bands contract, often preceding a significant price movement:
- Identify when the Bollinger Bands are narrowing significantly (bands coming closer together)
- Watch for a breakout from this low volatility state
- Enter in the direction of the breakout
- Set a profit target at the next support/resistance level
TradingView Implementation: Add the "Bollinger Bands Width" indicator to identify squeeze setups more easily. Look for the width indicator reaching a 6-month low, which often signals an impending volatility expansion.
2. Bollinger Band Bounce Strategy
This strategy works best in range-bound markets:
- Confirm the market is range-bound (price moving between established support and resistance)
- Wait for price to touch or slightly penetrate the lower Bollinger Band
- Look for a candlestick reversal pattern (hammer, bullish engulfing, etc.)
- Enter a long position with a stop loss below the reversal candle
- Target the middle band first, and potentially the upper band for additional profits
The reverse applies for short entries from the upper band.
3. Bollinger Band Double Bottom/Top (W & M Patterns)
These powerful reversal patterns have high reliability:
- W-Bottom (Bullish): Forms when price touches the lower band twice, with the second touch making a higher low and the middle bounce pushing near the middle band
- M-Top (Bearish): Forms when price touches the upper band twice, with the second touch making a lower high and the middle dip pushing near the middle band
These patterns show a failed attempt to continue in the previous direction and often signal a significant reversal.
4. Bollinger Band Breakout Strategy
For trending markets, breakouts beyond the bands can indicate continuation:
- Identify a strong trend (using Moving Averages)
- Wait for a candle to close beyond the Bollinger Band in the trend direction
- Enter in the direction of the breakout on the next candle
- Set a tight stop loss at the middle band
- Trail your stop as the trend develops
Key Point: In strong trends, price can "ride the bands" for extended periods. Don't automatically assume a reversal just because price touches a band.
Optimizing Bollinger Band Settings for Your Trading Style
Consider adjusting the default settings based on your trading approach:
- Short-term day trading: 10-period SMA with 2 standard deviations for more signals
- Swing trading: 20-period SMA with 2 standard deviations (standard settings)
- Position trading: 40-period SMA with 2.5 standard deviations for fewer false signals
- Highly volatile markets: Increase standard deviation to 2.5 or 3 to reduce false signals
- Low volatility markets: Decrease standard deviation to 1.5 to generate more signals
Common Bollinger Band Trading Mistakes
Avoid these frequent errors when trading with Bollinger Bands:
- Using bands as absolute buy/sell signals: Always look for confirmation from other indicators
- Ignoring the market context: Bands behave differently in trending vs. ranging markets
- Failing to adjust for volatility: Consider using different standard deviation settings for different market conditions
- Neglecting volume confirmation: Volume should increase on breakouts for confirmation
4. Moving Average Convergence Divergence (MACD): The Ultimate Trend and Momentum Indicator
The MACD (Moving Average Convergence Divergence) combines elements of trend following and momentum by showing the relationship between two moving averages of an asset's price, making it one of the most versatile indicators available to traders.
Why MACD is a Game-Changer for Trend Analysis
The MACD helps traders identify changes in the strength, direction, momentum, and duration of a trend. It's particularly useful for confirming trend changes and spotting divergence between price action and momentum. Unlike many other indicators, MACD provides multiple signals through its components, giving traders a comprehensive view of market dynamics.
Setting Up MACD in TradingView
To add MACD to your chart:
- Click on the "Indicators" button at the top of your chart
- Search for "MACD" in the Indicators & Strategies window
- Click "Add to Chart"
- The default settings are 12, 26, 9 (explained below)
Understanding the Components of MACD
The standard MACD setup includes three key components:
- MACD Line (Blue): The difference between the 12-period and 26-period Exponential Moving Averages (EMAs)
- Signal Line (Red): A 9-period EMA of the MACD Line
- Histogram: The difference between the MACD Line and Signal Line, visually representing the convergence and divergence of the two lines
High-Probability MACD Trading Strategies
1. MACD Crossover Strategy
The most basic MACD strategy focuses on crossovers:
- Bullish Crossover: When the MACD Line crosses above the Signal Line
- Bearish Crossover: When the MACD Line crosses below the Signal Line
Implementation:
- Wait for a crossover to occur
- Confirm the signal with other indicators (like an RSI or Moving Average)
- Enter in the direction of the crossover
- Set a stop loss at a recent swing high/low
2. MACD Zero Line Strategy
The zero line acts as a trend identifier:
- MACD above zero: Bullish trend likely in progress
- MACD below zero: Bearish trend likely in progress
- Crossing above zero: Potential start of bullish trend
- Crossing below zero: Potential start of bearish trend
Trading the Zero Line:
- Wait for MACD to cross the zero line
- Confirm with price action (candlestick patterns) or other indicators
- Enter in the direction of the crossover
- Consider using a larger stop loss as these are often major trend signals
3. MACD Divergence Strategy
Divergence between price and MACD often signals a potential reversal:
- Bullish Divergence: Price makes lower lows, but MACD makes higher lows
- Bearish Divergence: Price makes higher highs, but MACD makes lower highs
Trading MACD Divergence:
- Identify a clear trend
- Look for divergence between price and MACD
- Wait for confirmation (usually a MACD crossover in the new direction)
- Enter in the direction suggested by the divergence
- Set a stop loss beyond the recent swing high/low
4. MACD Histogram Strategy
The histogram visually represents momentum:
- Increasing histogram size: Momentum is building in the current direction
- Decreasing histogram size: Momentum is weakening, potential reversal ahead
- Color changes: Indicate crossovers between MACD and Signal lines
Histogram Trading Technique:
- Identify a trend using other indicators
- Watch for histogram bars getting shorter (momentum slowing)
- Prepare for potential entry when histogram changes color
- Confirm with other signals before entering
Fine-Tuning MACD Settings for Different Markets
While the default settings (12, 26, 9) work well in many situations, consider these adjustments:
- Fast markets (crypto, volatile stocks): Try 8, 17, 9 for quicker signals
- Slower markets (major forex pairs, blue chip stocks): Try 19, 39, 9 for fewer false signals
- Day trading: Consider 6, 19, 9 for more responsive signals on shorter timeframes
- Position trading: Try 21, 55, 9 for long-term trend identification
MACD MultiTimeframe Analysis for Improved Accuracy
Using MACD across multiple timeframes can significantly improve your success rate:
- Check MACD on a higher timeframe to identify the overall trend direction
- Switch to your trading timeframe to find specific entry points
- Only take trades that align with the higher timeframe trend
- For best results, maintain a 4:1 ratio between timeframes (e.g., Daily for trend, 4-hour for entries)
5. Volume Profile: Understanding Where the Smart Money Trades
Unlike the previous indicators that focus primarily on price action, Volume Profile shows the trading activity at specific price levels over a chosen period, highlighting where the most significant trading interest has occurred and revealing key support and resistance levels based on actual market participation.
Why Volume Profile Sets Professional Traders Apart
Volume Profile helps you identify significant support and resistance levels based on actual trading activity rather than just price movements. It shows you where the market has spent the most time and where the most trades have occurred, essentially revealing where "smart money" is positioned. This gives you an edge by helping you understand the market structure from an institutional perspective.
Setting Up Volume Profile in TradingView
To add Volume Profile to your chart:
- Click on the "Indicators" button at the top of your chart
- Search for "Volume Profile" in the Indicators & Strategies window
- Select "Volume Profile Fixed Range" or "Volume Profile Visible Range"
- Adjust the settings based on your analysis needs
- Click "Add to Chart"
Volume Profile Components and How to Interpret Them
Key concepts to understand for effective Volume Profile analysis:
- Point of Control (POC): The price level with the highest traded volume, shown as the longest horizontal bar on the profile. This is typically the strongest support/resistance level.
- Value Area: The range where a specified percentage (usually 70%) of all volume occurred. This represents where the market spent most of its time.
- Value Area High (VAH): The upper boundary of the Value Area
- Value Area Low (VAL): The lower boundary of the Value Area
- High Volume Nodes (HVN): Price levels with significant trading activity, indicating potential support/resistance
- Low Volume Nodes (LVN): Areas with minimal trading activity that often act as breakout points
Market-Tested Volume Profile Trading Strategies
1. Initial Balance Breakout Strategy
This strategy focuses on the first hour of trading (particularly useful for day traders):
- Define the Initial Balance by setting the Volume Profile to the first hour of trading
- Identify the Value Area and Point of Control within this range
- Wait for price to break above the Value Area High or below the Value Area Low
- Enter in the direction of the breakout
- Set a stop loss on the opposite side of the Value Area
- Target the next significant support/resistance level
2. Point of Control (POC) Rejection Strategy
The POC often acts as a magnet for price, providing potential trading opportunities:
- Identify the Point of Control on a relevant timeframe (daily for swing traders, hourly for day traders)
- Wait for price to approach the POC
- Look for rejection signals (candlestick patterns, RSI divergence, etc.)
- Enter in the direction of the rejection
- Place a stop loss beyond the POC
- Target the edge of the Value Area or the next significant support/resistance
3. Low Volume Node Breakout Strategy
Low Volume Nodes (LVNs) represent areas where price moved quickly with minimal trading activity:
- Identify significant Low Volume Nodes on your Volume Profile
- Watch for price approaching these areas
- Be prepared for a swift move through these zones (as there's little historical interest to act as support/resistance)
- Enter in the direction of the breakout through an LVN
- Set a tight stop loss as moves through LVNs are often rapid
- Target the next High Volume Node as potential resistance
4. Value Area High/Low Strategy
The boundaries of the Value Area often act as support and resistance:
- Identify the Value Area High (VAH) and Value Area Low (VAL)
- Look for price rejection at these levels
- If price is rejected at VAH, consider a short position targeting the POC or VAL
- If price is rejected at VAL, consider a long position targeting the POC or VAH
- For breakouts, enter when price moves beyond VAH or VAL with conviction (strong candle, increased volume)
Optimal Volume Profile Settings for Different Trading Scenarios
Customize your Volume Profile based on your trading approach:
- Day Trading: Use "Session" or "Fixed Range" Volume Profile focusing on the current day with Row Size set to 25-50 to capture intraday price levels
- Swing Trading: Use "Visible Range" Volume Profile with a 2-4 week period and Row Size of 100 to identify key levels
- Position Trading: Apply "Fixed Range" Volume Profile to several months of data with a Row Size of 150-200 to identify major structural levels
- Value Area Percentage: The standard 70% works well for most markets, but consider increasing to 80% for volatile markets
Combining Volume Profile with Other Indicators
Volume Profile becomes even more powerful when combined with:
- Moving Averages: When key MAs align with Volume Profile nodes, these levels become significantly more important
- RSI: Volume Profile support/resistance levels that coincide with overbought/oversold RSI readings provide high-probability reversal points
- Bollinger Bands: Volume Profile nodes near Bollinger Band extremes can indicate potential reversal zones
- VWAP (Volume Weighted Average Price): When VWAP crosses the Point of Control, it often signals a shift in intraday sentiment
Advanced Volume Profile Techniques
As you become more comfortable with Volume Profile analysis, explore these advanced concepts:
- Composite Profiles: Combining multiple time periods to identify persistent support/resistance levels
- Developing Value Areas: Tracking how the Value Area evolves throughout a trading session to identify potential reversals
- Volume Delta: Analyzing the difference between buying and selling volume at specific price levels
- Market Profile Integration: Combining Volume Profile with time-price opportunity analysis
Common Volume Profile Trading Mistakes
Even experienced traders make these errors when using Volume Profile:
- Using too short analysis periods: For meaningful volume distribution, analyze enough data to capture significant market behavior (at least 20-30 trading sessions for swing trading)
- Ignoring market context: Volume Profile levels have different significance in trending vs ranging markets
- Treating all volume nodes equally: The recency of volume formation matters; newer high-volume nodes may have more relevance than older ones
- Neglecting time-of-day patterns: Volume distribution varies significantly during different trading sessions (Asian, European, American)
- Over-cluttering charts: Use Volume Profile selectively on key time periods rather than having multiple overlapping profiles
Practical Volume Profile Exercise for Beginners
To develop your Volume Profile skills, try this practical exercise:
- Select a liquid instrument you're interested in trading
- Add Volume Profile to a daily chart covering the past 3 months
- Identify the most significant POCs and high-volume nodes
- Mark these levels on your chart as potential support/resistance zones
- Over the next two weeks, observe how price interacts with these levels
- Journal which levels held as support/resistance and which ones were broken
- After two weeks, analyze your observations to identify patterns in how price respects volume structures
This exercise will help you develop an intuitive feel for how Volume Profile relates to future price action, an essential skill for advanced technical analysis.
Putting It All Together: Creating Your First High-Probability Trading System
While understanding each indicator individually is important, the real power comes from combining them into a coherent trading strategy that provides multiple confirmations before you risk your capital. Here's a systematic approach for beginners to create a complete trading strategy:
The 5-Step Indicator Integration Process
- Start with the trend direction: Use Moving Averages (specifically the 50 and 200 SMAs) to identify the overall market direction. Only take trades in the direction of the trend for highest probability.
- Confirm with momentum: Check RSI and MACD to ensure momentum aligns with the trend. Look for MACD histogram increasing and RSI above 50 for uptrends (reverse for downtrends).
- Find precise entry/exit points: Use Bollinger Bands to identify potential reversal points or continuation patterns. Look for price testing the bands with corresponding reversal candle patterns.
- Validate with volume structure: Confirm signals with Volume Profile to ensure there's significant activity supporting your trade thesis. The best trades occur near high-volume nodes or Points of Control.
- Manage risk appropriately: Set stop losses at logical levels based on these indicators (below recent swing low for longs, above recent swing high for shorts) and take profits at predefined targets based on historical resistance/support.
A Complete TradingView Strategy Template for Beginners
Here's a practical strategy template you can implement immediately:
Trend-Following Strategy with Multiple Confirmations
Setup:
- Chart Settings: Daily timeframe for trend identification, 4-hour for entries
- Moving Averages: 20 EMA, 50 SMA, 200 SMA
- RSI: 14-period
- MACD: 12, 26, 9 settings
- Bollinger Bands: 20-period, 2 standard deviations
- Volume Profile: Visible Range over the past 3 months
Entry Conditions (Long):
- Price is above both 50 and 200 SMAs (confirmed uptrend)
- 20 EMA is above 50 SMA (strong recent momentum)
- RSI is above 50 and rising (confirmed momentum)
- MACD histogram is positive and increasing (accelerating momentum)
- Price pulls back to touch the 20 EMA or lower Bollinger Band
- Pullback occurs near a Volume Profile high-volume node (support level)
- Entry candlestick shows rejection of lower prices (hammer, bullish engulfing, etc.)
Exit Conditions (Long):
- Take Partial Profits: When price reaches upper Bollinger Band
- Take Additional Profits: At next significant Volume Profile resistance
- Final Exit: When MACD crosses below Signal Line or RSI drops below 50
- Stop Loss: Below the recent swing low or below the Volume Profile node that provided support
For short positions, reverse all conditions.
Indicator Synergy: Why These 5 Indicators Work Better Together
These indicators complement each other by addressing different aspects of market analysis:
- Moving Averages: Provide trend direction and dynamic support/resistance
- RSI: Measures momentum and identifies potential reversals
- MACD: Confirms trend direction and momentum changes
- Bollinger Bands: Visualize volatility and potential price extremes
- Volume Profile: Reveals price levels with significant historical interest
By requiring confirmation from multiple indicators, you filter out many false signals and low-probability setups, significantly improving your win rate and risk-to-reward ratio.
Remember, no indicator is perfect on its own. Each has strengths and weaknesses, which is why combining complementary indicators often yields better results than relying on any single one. The key is to understand what each indicator is telling you about the market and look for consensus among them before placing a trade.
Next Steps: From Manual Indicators to Automated PineScript Strategies
Once you've mastered these essential indicators and understand how they work together, you're ready to take your trading to the next level with automated strategies. TradingView's PineScript programming language allows you to transform these indicators into actionable trading systems that can:
- Generate precise, objective entry and exit signals based on your specific criteria
- Remove emotional decision-making from your trading process, helping you stick to your strategy
- Backtest your strategies against years of historical data across multiple timeframes
- Scan multiple markets simultaneously to identify the highest-probability setups
- Send real-time alerts to your mobile device when trading opportunities emerge
- Automate your trading through integration with brokers and third-party services
Why PineScript is the Future of Retail Trading
PineScript has revolutionized how retail traders approach the markets by putting institutional-grade tools in the hands of individual traders:
- Customization: Fine-tune indicators to your specific trading style and preferences
- Combination: Merge multiple indicators into cohesive systems with clear signals
- Backtesting: Verify strategy performance across different market conditions
- Automation: Implement rule-based trading without watching charts all day
- Consistency: Execute your strategy without emotional interference
Turning the 5 Essential Indicators into Automated Strategies
Here's how each indicator can be integrated into your PineScript strategies:
- Moving Averages: Code crossover signals, dynamic support/resistance levels, and trend identification
- RSI: Program alerts for overbought/oversold conditions, divergences, and centerline crossovers
- Bollinger Bands: Automate squeeze detection, band touch signals, and volatility-based position sizing
- MACD: Create histogram strength measurements, signal line crossover alerts, and divergence detection
- Volume Profile: Develop algorithms to identify high-probability price levels for entries and exits
Professional-Grade PineScript Strategies Without the Learning Curve
At trading-strategies.co, we've done the hard work for you. We offer professionally designed, extensively backtested PineScript strategies that incorporate these essential indicators and advanced techniques to help you navigate the markets with confidence.
Our strategies are designed for:
- Beginners: Easy-to-implement strategies with clear signals and comprehensive documentation
- Intermediate Traders: Customizable systems that can be adapted to different markets and timeframes
- Advanced Traders: Sophisticated multi-timeframe strategies with advanced risk management features
Whether you're looking to automate your trading entirely or simply want objective signals to support your manual trading decisions, our collection of TradingView strategies can help you achieve your trading goals faster and with greater consistency.
Conclusion: Building Your Indicator Foundation for Long-Term Trading Success
Mastering these five essential TradingView indicators provides you with a comprehensive foundation for technical analysis and profitable trading. While there are hundreds of indicators available, these five work together to give you a complete picture of market dynamics, covering trends, momentum, volatility, and volume—the fundamental elements of effective trading.
Key Takeaways for Beginner Traders
- Start with Moving Averages to identify the primary trend direction before considering any trade
- Use RSI and MACD to confirm momentum aligns with the trend and to spot potential reversals early
- Apply Bollinger Bands to visualize volatility and identify precise entry and exit points
- Leverage Volume Profile to understand where significant buying and selling has occurred historically
- Combine all five indicators for a complete trading system with multiple confirmations
- Consider automating your strategy with PineScript to remove emotions and improve consistency
Remember: Trading Success Is About Probability, Not Certainty
Even the best indicators are tools, not crystal balls. They work best when:
- Used in combination rather than isolation to confirm signals
- Applied in appropriate market contexts (trending vs. ranging conditions)
- Supported by proper risk management (position sizing, stop losses, profit targets)
- Viewed as probability enhancers rather than guarantees of success
- Continuously evaluated and adjusted as market conditions evolve
Your Path Forward as a Technical Trader
Start by mastering these essential indicators individually, then practice combining them into a cohesive strategy. Keep a trading journal to track your observations and results. As your confidence and experience grow, consider exploring automated trading through TradingView's PineScript language or professionally designed strategies like those we offer at trading-strategies.co.
Your trading journey is a marathon, not a sprint. Building a solid foundation with these indicators is an excellent first step toward consistent profitability.
Take Action Today
Ready to see these indicators in action? Check out our collection of professional TradingView strategies that leverage these indicators and advanced techniques to help you navigate the markets with confidence. Our strategies are designed to be easy to implement while providing sophisticated analysis that would take years to develop on your own.
Still have questions about technical indicators or how to implement them effectively? Contact our team for personalized guidance on your trading journey.
Disclaimer: Trading involves risk. Past performance of any trading system or methodology is not necessarily indicative of future results. Always conduct your own research and consider your financial situation before making investment decisions.